Adding Actions
Adding actions gives you opportunity to create some pizzazz in your presentations. You can set objects in motion and actively adjust there appearance in a custom fashion.
To add an Action to an object:
Activate the object you want to add the Action to by clicking the object in the timeline.
Slide the Timeline Indicator over the middle segment of the object (not over the Fades or other Actions if any exist).

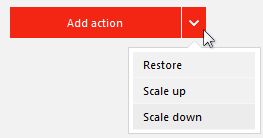
Figure 1: Position the Timeline Indicator before adding your action. Click either the [Add Action] button or the preset button [ ]. This will place an action marker on the object.

Figure 2: An object with an action marker placed. Click the action to activate it. It will highlight in yellow and display handles.

Figure 3: An Object with an Action added. Edit the action.
There are various ways to control the Action within the object controls. See the bullet list below and the Action Editing Notes sidebar.Extend or contract the length of the action using the handles. When you click on an action handle the Timeline Indicator will jump to that position.
Reposition the Action on the object timeline to control when it occurs by clicking-and-dragging directly on the Action marker (not the handles).
Change the appearance of the object (e.g., placement, opacity, size, rotation) of the object using the preview window controls or the object control panel. By controlling the settings at the beginning and end of the Action you can create custom effects with motion, size and visibility
Open the popup menu by right-clicking the Action to adjust tweening, play the action or delete it. and then the Tweening menu to make your selection. See Figure 4 and Table 1

Figure 4: The Action menu revealed with right click. # Name Description 1 Action Preview Click to preview the action. 2 Tween Selector Click to open a pop-up menu with tweening behavior selections. 3 Delete Action Deletes current action. 4 Delete All Actions [ Not pictured ]. Available when an object has several actions. It will delete all actions in the object.
SIDEBAR: Action Editing Note
The beginning of an added action will adopt the settings for the current position of the object. Nothing will happen in the action until you edit the object properties.
The timeline indicator is placed at the end of the added action automatically so you can control what you want as the end result for the object.
The timeline indicator does not have to be placed exactly on the action handle to edit the behavior. As long as the object is active and the indicator is over the object (not the action or the fade), the appearance and placement adjustments will take effect.
Placing multiple actions allows complex effects that change appearance and position of the object multiple times.
When placing multiple actions on one object activating the object rather than the action displays the motion path for all actions (if any).
With motion paths displayed, each node can be moved with click-and-drag to fine-tune placement.
Action Presets
Action presets help you apply effects in a click. While you'd be able to do them yourself, these tools will save you time in production.

| Name | Description |
|---|---|
| Restore | Returns the object to its previous state (e.g., If you zoom in on an object with one action, place the timeline indicator over the object and after the first action then add a Restore. This will automatically bring the object back to the initial state of the previous action. |
| Scale Up | Scales up the object. |
| Scale Down | Scales down the object. |
| Center and Fit | Moves the object back to its original position without changing other qualities. |